 ### Why Payment Links?
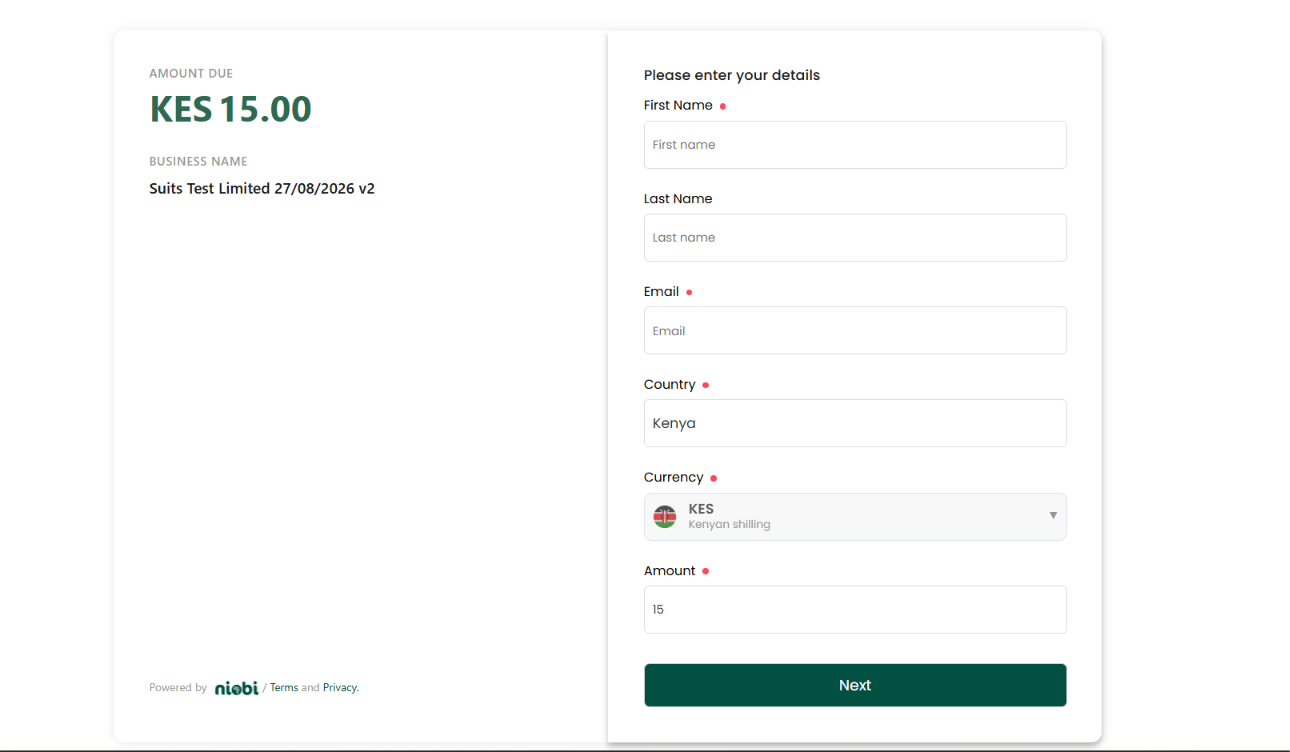
* **Zero front-end engineering:** Niobi hosts the entire checkout page, so you don't need to build payment forms, input masks, or error-handling UI.
* **Multi-currency & country support:** Payer details, country selection, and currency are handled on the page itself.
* **Flexible distribution:** Share the link over WhatsApp, SMS, invoices, email, or a website or app checkout button, or embed it as a QR code for a customer to scan in person.
* **Instant reconciliation:** When the customer completes payment, Niobi credits your merchant wallet and dispatches the same webhook callback (`payment_step: 2`) used across every other collection method.
***
## Two Ways to Create a Payment Link
A payment link can be created in one of two ways, depending on who is creating it and why:
```mermaid theme={null}
%%{init: {'themeVariables': {'fontSize': '23px', 'actorBorder': '#0D9373', 'actorLineColor': '#0D9373', 'signalColor': '#0D9373', 'noteBorderColor': '#0D9373'}, 'sequence': {'width': 220, 'height': 95, 'actorMargin': 80, 'messageMargin': 60, 'boxMargin': 18, 'noteMargin': 18}}}%%
sequenceDiagram
autonumber
participant You as You (Dashboard or API)
participant Niobi as Niobi
participant Customer as Customer
alt Via Dashboard (no-code)
You->>Niobi: Payments -> Payment Links -> Create
else Via API (programmatic)
You->>Niobi: POST /api/v3/payment-link-api/create
end
Niobi-->>You: Checkout URL generated
You->>Customer: Share the link (WhatsApp, SMS, email, invoice, website, or QR code)
Customer->>Niobi: Opens the hosted checkout page
Customer->>Niobi: Selects payment method and completes payment
Niobi->>You: Webhook callback (payment_step: 2)
Note over You: Reconcile and credit the merchant wallet
```
### Why Payment Links?
* **Zero front-end engineering:** Niobi hosts the entire checkout page, so you don't need to build payment forms, input masks, or error-handling UI.
* **Multi-currency & country support:** Payer details, country selection, and currency are handled on the page itself.
* **Flexible distribution:** Share the link over WhatsApp, SMS, invoices, email, or a website or app checkout button, or embed it as a QR code for a customer to scan in person.
* **Instant reconciliation:** When the customer completes payment, Niobi credits your merchant wallet and dispatches the same webhook callback (`payment_step: 2`) used across every other collection method.
***
## Two Ways to Create a Payment Link
A payment link can be created in one of two ways, depending on who is creating it and why:
```mermaid theme={null}
%%{init: {'themeVariables': {'fontSize': '23px', 'actorBorder': '#0D9373', 'actorLineColor': '#0D9373', 'signalColor': '#0D9373', 'noteBorderColor': '#0D9373'}, 'sequence': {'width': 220, 'height': 95, 'actorMargin': 80, 'messageMargin': 60, 'boxMargin': 18, 'noteMargin': 18}}}%%
sequenceDiagram
autonumber
participant You as You (Dashboard or API)
participant Niobi as Niobi
participant Customer as Customer
alt Via Dashboard (no-code)
You->>Niobi: Payments -> Payment Links -> Create
else Via API (programmatic)
You->>Niobi: POST /api/v3/payment-link-api/create
end
Niobi-->>You: Checkout URL generated
You->>Customer: Share the link (WhatsApp, SMS, email, invoice, website, or QR code)
Customer->>Niobi: Opens the hosted checkout page
Customer->>Niobi: Selects payment method and completes payment
Niobi->>You: Webhook callback (payment_step: 2)
Note over You: Reconcile and credit the merchant wallet
```