Who is this feature for?
This feature is for platforms, marketplaces, PSPs, and merchants that need to onboard and manage multiple Sub-Merchants (Sub-Merchant) under a single Niobi account. Typical users:- Marketplaces that settle funds to individual vendors
- Payment service providers integrating multiple merchants
- Enterprises managing separate merchant accounts for reporting or compliance
Adding a Sub-Merchant
To add a Sub-Merchant via the Niobi portal:- Log in to your Niobi dashboard.
- Navigate to Workspace > Sub-Merchant.
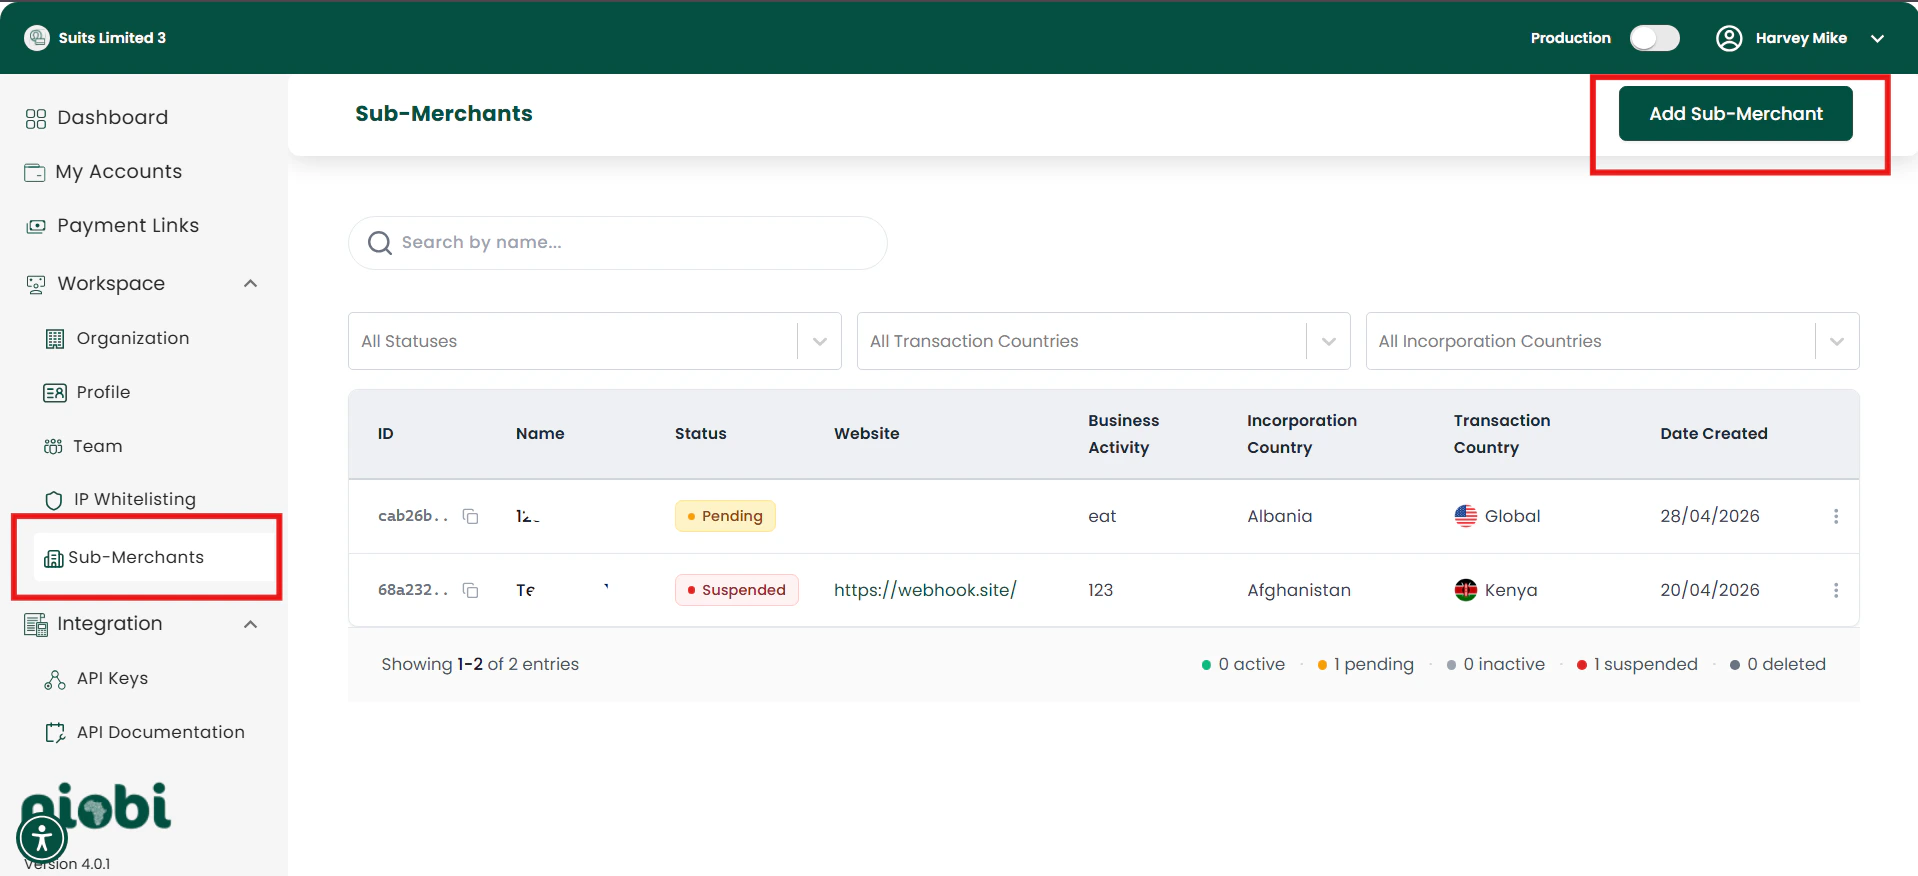
- Click “Add New Sub-Merchant”.
- Complete the form with the Sub-Merchant’s business and contact details:
- Sub-Merchant name
- Business activity and website
- Incoorporation and transaction country
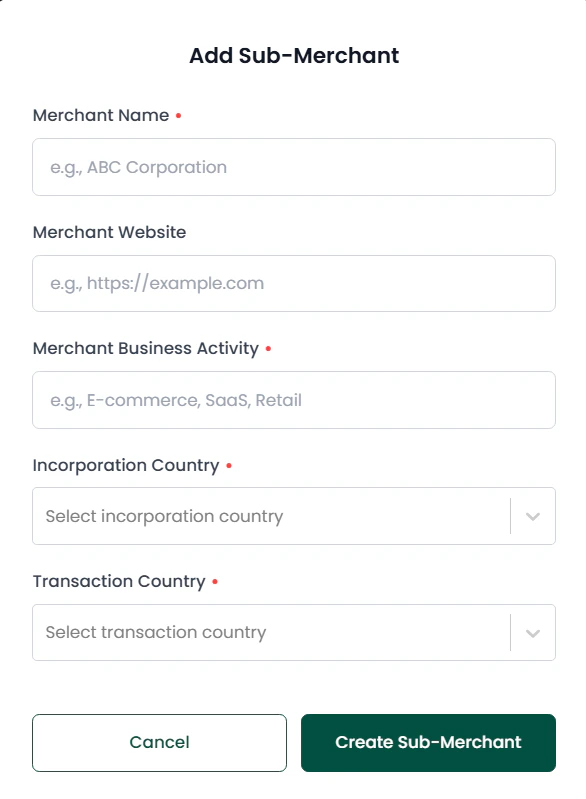
- Submit the form.
Approval and review process
All newly created Sub-Merchants enter a review workflow before they can process live transactions.- Status: Pending — The Sub-Merchant has been created and awaits review by the compliance team.
- Status: Approved — The Sub-Merchant passed review and can process transactions.
- Status: Suspended — The Sub-Merchant has been blocked due to compliance issues, suspicious activity, or policy violations. Suspended Sub-Merchants cannot process live transactions. Contact support@niobi.co to understand the reason and appeal if applicable.
- Submit required business and KYC documents via the Niobi portal.
- Niobi performs identity and risk checks.
- Manual or automated approval is applied; the account moves to Approved or Suspended.
How to get and use the Sub-Merchant ID in API calls
Where to find the ID:- After creating a Sub-Merchant in the Niobi portal, the dashboard lists the
sub_merchant_idin the Sub-Merchant list.
sub_merchant_id in your payment payload to associate transactions.
Sample Deposit request:
| Variable | Description |
|---|---|
client_id | Your integration client_id provided by Niobi |
sub_merchant_id | The unique identifier for the Sub-Merchant |
callback_url | URL to receive asynchronous notifications |
amount | Transaction amount |
currency | Currency code (e.g., KES) |
timestamp | Unix timestamp used when creating the signature |
signature | HMAC signature for request validation |
How to test?
- Create a test Sub-Merchant in the Niobi portal under sandbox mode.
- Retrieve the
sub_merchant_idfrom the Sub-Merchant list. - Make a sandbox deposit or payout request including
sub_merchant_id(use the sample request above). - Verify the transaction shows the Sub-Merchant in the dashboard and webhooks.
Sub-Merchant State Changes
- Pending: Wait for approval. Do not send live transactions.
- Approved: Proceed with live transactions and reporting.
- Suspended: The Sub-Merchant is blocked. No live transactions can be processed. Contact support@niobi.co to understand the reason and request reinstatement.