

Overview
Niobi’s Unified Collections API allows your application to collect payments from customers across Africa through a single standardized integration. Whether your customer pays via Mobile Money (STK Push, OTP, or USSD), Bank Transfer, Dynamic Virtual Account, or Browser Redirect, you send a signed request to the unified collections endpoint: Endpoint:POST /api/v4/niobi-unified-collections
Step 1Request Initiation
payment_step: 1- Your backend sends a signed
POST /api/v4/niobi-unified-collectionsrequest, which Niobi dispatches to the telco or bank switch. - Niobi returns an initial HTTP response confirming the transaction was initiated and is pending customer authorization.
- The switch triggers an STK push, prompt, or issues a virtual account, and the customer authorizes payment (PIN entry or transfer).
Step 2Terminal Outcome
payment_step: 2- The switch confirms the payment outcome back to Niobi.
- Niobi sends a webhook callback to your
callback_urlwith the final status. - Reconcile the transaction and credit the user based on the final terminal state.
API Environments & Base URLs
Niobi provides separate environments for integration testing and live transaction processing:
All collection endpoints referenced throughout this guide are relative to your target environment’s base URL.
Understanding Payment Steps (payment_step)
A critical concept in Niobi’s collection architecture is the two-step payment lifecycle:
Step 1Request Initiation
payment_step: 1Initial HTTP response to the request when it’s successful, telling you the transaction was accepted by the telco/bank switch.
Step 2Terminal Outcome
payment_step: 2Asynchronous webhook callback delivering the final result (success or failed).
1. payment_step: 1 (Initial API Response)
- Delivery: Synchronous HTTP response returned immediately when calling
POST /api/v4/niobi-unified-collections. - Meaning: The request passed validation, authentication was verified, and the transaction was accepted and dispatched to the upstream payment processor or telco switch.
- Important: This is an acknowledgement that the process has begun, not the final payment outcome. The customer has not yet entered their PIN or completed the transfer.
Absence of
If a collection request fails during initial submission (for example, due to an invalid phone number format, unsupported method, or immediate upstream processor rejection returning
payment_step on Initiation Failures:If a collection request fails during initial submission (for example, due to an invalid phone number format, unsupported method, or immediate upstream processor rejection returning
status_code: "000005"), the "payment_step" field is not present in the response. Your backend must inspect status_code ("000000" vs "000005") rather than assuming payment_step is always returned.2. payment_step: 2 (Terminal Callback)
- Delivery: Asynchronous callback POST request sent to the
callback_urlpassed in your request. - Meaning: The transaction has reached its final terminal state.
- Action: When
"payment_step": 2is present in theparamsobject of the callback, treat this as the final outcome. Reconcile your records based onstatus: "success"(status_code: "000000") orstatus: "failed"(status_code: "000005"). Full details are covered in Collection Callbacks.
Request Parameters
The unified collections endpoint accepts standard parameters wrapped in the signed envelope:Front-End Integration Pathways
Niobi gives you 2 ways to deliver payment collections to your customers:Option 1: Niobi Hosted Checkout (Fastest & Zero UI Code)
If you want to start accepting payments immediately without building and maintaining custom checkout forms, input validation, or tokenization UI, use Niobi Hosted Checkout powered by Payment Links.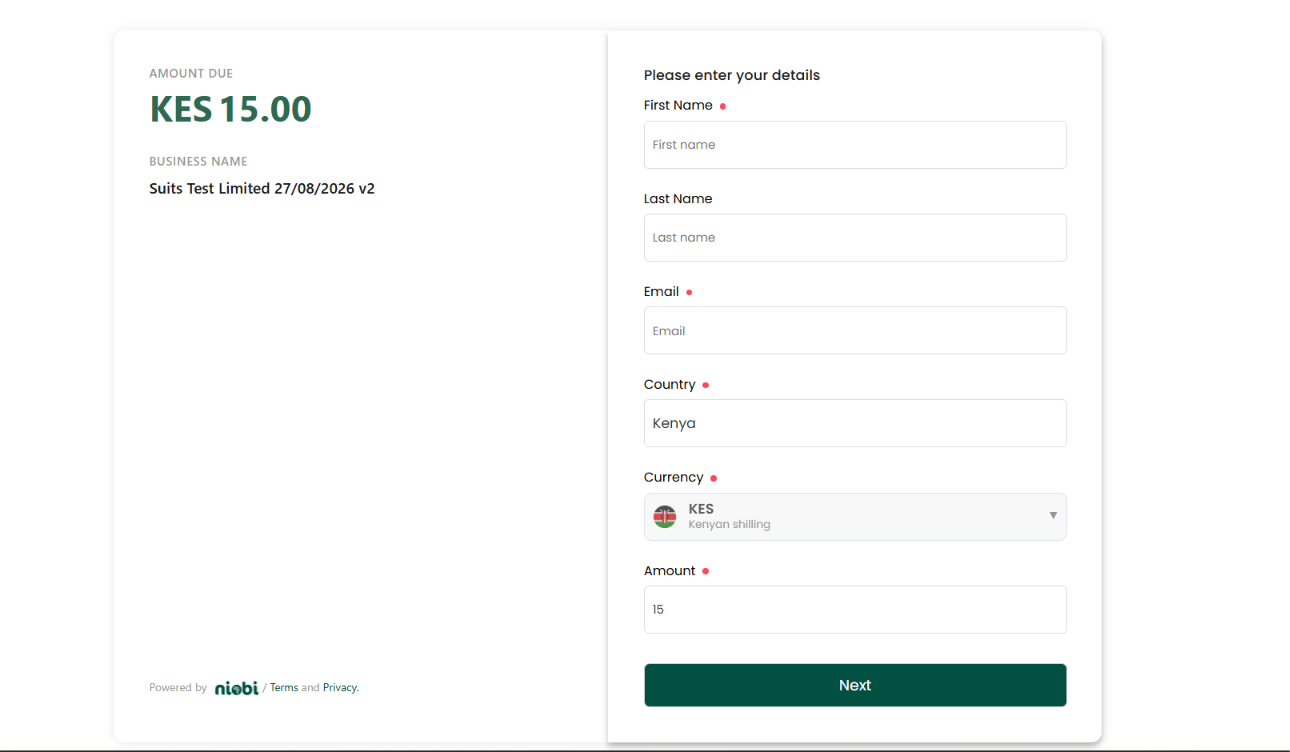
How It Works:
- Create via Dashboard (No-Code) or API:
- Dashboard (No-Code): Log into your Niobi Dashboard, navigate to Payments -> Payment Links, click Create Payment Link, configure your business details and amount (fixed or customer-entered), and copy your generated checkout URL immediately.
- API (Programmatic): Call the Create Payment Link API (
POST /api/v3/payment-link-api/create) to dynamically generate customized payment links on demand from your backend.
- Manage & Retrieve: View, edit, filter, or retrieve active links in the dashboard or via the Payment Link List API (
GET /api/payment-link-api/list). - Share or Redirect: Share the link via WhatsApp, SMS, invoices, emails, or redirect customers directly from your web or mobile checkout button.
- Automated Settlement & Callback: The customer completes payment on the secure hosted checkout page. Niobi confirms the transaction, credits your merchant wallet, and dispatches an asynchronous webhook callback (
payment_step: 2) to your server.
Option 2: Direct API Integration (Custom UI / White-Label)
If you require 100% white-labeled control over every UI element and payment form, integrate directly with our collections endpoint:1
1. Initiate Collection via API
Send a signed
POST request to /api/v4/niobi-unified-collections:Sample Request
Sample Initial API Responses
- Initiation Successful (payment_step: 1)
- Initiation Failed
Understanding the Two “Success” Indicators:
You will notice two different success indicators in the initial response:
You will notice two different success indicators in the initial response:
- Outer
"success": true(Root Level): Indicates the HTTP API Request Status (Request Successfully Initiated). It confirms that your API call was authenticated, structurally valid, and successfully received by Niobi servers. - Inner
"status": "success"(Insidedata): Indicates the Transaction Initiation State. Used together with"status_code": "000000"and"payment_step": 1, it confirms that the upstream provider or telco switch accepted the collection request and triggered the authorization prompt on the payer’s device. It signifies successful initiation, not final fund settlement.
2
2. Customer Authorization
Depending on the selected payment method:
- Mobile Money (STK Push): The customer receives an on-screen prompt on their mobile phone and enters their PIN.
- OTP Payins (e.g. Ivory Coast Orange): The customer receives an SMS OTP, which your UI collects and submits to
/api/v4/niobi-unified-process-transaction. - Virtual Account (e.g. Nigeria): The initial response returns an
account_numberandbank_name. Display these details to the customer to complete a standard bank transfer within 30 minutes. - Browser Redirect (e.g. Wave, South Africa Bank EFT): The response includes an
authorization_url. Redirect the customer to open the URL in their browser to complete payment.
3
3. Handle Final Transaction Outcome
When the transaction concludes, Niobi sends an asynchronous callback containing
"payment_step": 2 to the callback_url passed under params.callback_url in your collection request.Sample Terminal Callbacks (payment_step: 2)
- Successful Payment (000000)
- Failed Payment (000005)
Handling Collection Timeouts (
000006):000006 is not a callback outcome, it only appears when you query the Transaction Status API while a collection is still awaiting customer authorization past the standard 2-minute window. Timeouts can be triggered by several factors:- Customer Inaction: The payer did not enter their PIN or respond to the prompt before the session expired.
- Mobile Operator / SMS Latency: Delays across the telco network in delivering the STK or USSD push to the user’s handset.
- Upstream Processor Congestion: Temporary clearing latency with partner banking switches or mobile money providers.
000006, do not immediately prompt the customer to pay again. Wait 2 to 3 minutes and query again, the transaction will eventually resolve to success (000000) or failed (000005), and that final outcome is what arrives in the payment_step: 2 callback.On-Demand Status Verification:
If you ever need to confirm or query the current status of a collection on demand (for example, if a network disruption delayed your webhook callback), call our Get Transaction Status API (
If you ever need to confirm or query the current status of a collection on demand (for example, if a network disruption delayed your webhook callback), call our Get Transaction Status API (
POST /api/v3/get-unified-transaction-status) by passing "type": "payin" and your transaction reference in "id".